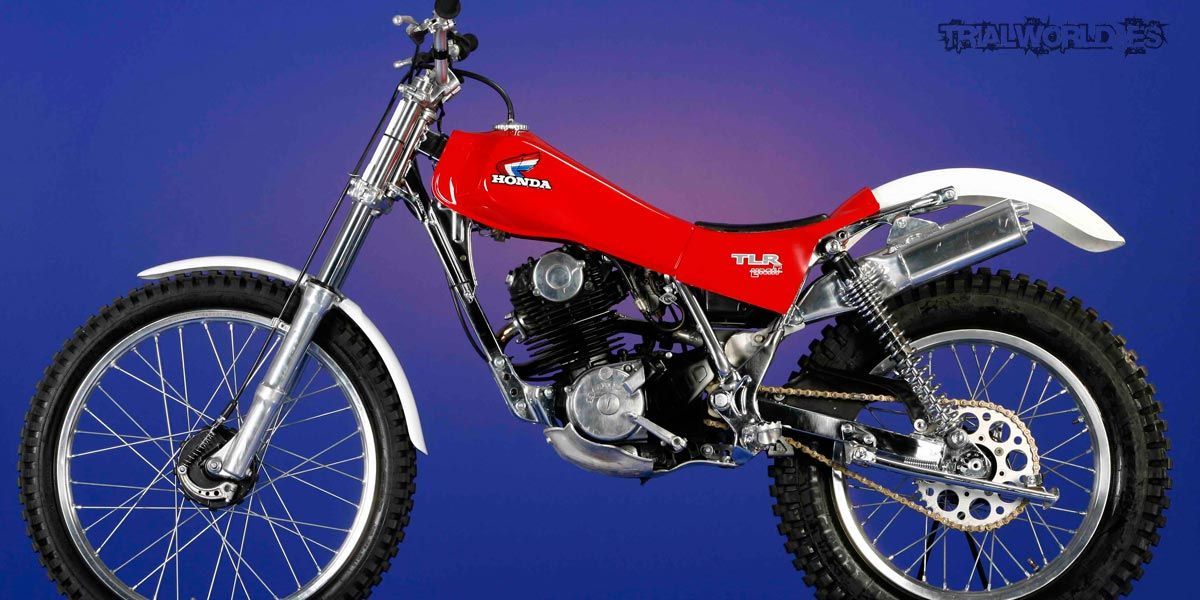
Holders/users of the Honda TLR As a general rule, they greatly appreciate the benefits of this motorcycle and speak especially well of its suspensions (Showa) and its engine in terms of traction and progressiveness, as well as the ability to ride at a low speed (if the motorcycle is properly carbureted).
They also issue two widespread criticisms: the clutch is not progressive and the engine power is just right.
Improve the progressivity and performance of the Honda TLR clutch
After
testing the Honda TLR 200
, let’s focus on the first thing, i.e. the progressivity of the clutch.

For those who don’t know the problem, I explain that the clutch of the Honda TLR is very direct in its actuation, that is, it clutches and disengages very abruptly which causes various problems in users/riders, whether amateurs or experts, (in fact the previous owner of the TLR confessed to me that although he loved the bike, he could never adapt to the response of the clutch).
What are the problems?
By operating the clutch lever (clutch), mostly in compromising situations, and then releasing it (disengaging), the clutch acts suddenly, tremorously, and makes the rider lose control of the bike, with the consequent risk of failure in the area or, more importantly, of safety for the physical integrity of the rider or damage to the bike due to falling.
Likewise, in the face of what we call “a hitch” on a trial trail and coming out of a standstill, the bike becomes very abrupt when disengaging (trepidation), causing losses of traction and stability.
That is why I am going to explain how to solve this problem that Honda solved many years ago, as far as I have been able to investigate back in August 2001 and although it talks about another Honda model the CG 125 both share the same clutch with countless models such as the current Honda CBR 125, etc.


Can you imagine a road bike without a progressive clutch in which it is only possible to start doing wheelies? People would end up on the floor at traffic lights…
Tell you that I haven’t discovered gunpowder. In English and German forums there is talk of this modification and Honda TLR users know the solution and apply it, but what motivates me to disseminate this improvement is the lack of a tutorial in Spanish so that those Honda TLR users who want to, enjoy the improvement and increase their confidence in the bike.
Why does the clutch fail like this?
The clutch of the TLR in my opinion presents two problems, first: it has only 5 clutch discs and they are very small and second the discs are not directly bathed in oil, that is, the oil level in the crankcase is well below the clutch bell that contains the discs so its lubrication is not very abundant.
After disassembly I tried to discover some auxiliary lubrication system through the shaft or another and I did not find it, so I deduce that it is only lubricated by bubbling. That combination, I think, is the cause of the abrupt response. I will be happy if any more experienced engineer or mechanic can corroborate this interpretation.
What do we achieve with the modification?
The clutch becomes progressive, modulable and prevents it from shaking or shaking. We can make the clutch slip and avoid or minimize it from stalling if we are in a higher gear than recommended, being able to “pull” the clutch if we need it.
Who can make the modification?
Any mechanic and also anyone with some skill and basic-medium knowledge in mechanics.
Is it too expensive to make the modification?
The cost of the material is around 50 euros, it includes the three parts that are needed +-35 euros (later I will tell you) and the gasket of the semi crankcase another 11.50 euros (optional) plus labor.
What material do we need?
First of all we go to a Honda dealership and order the parts. I say Honda dealer because on Ebay they also sell it but it is more expensive, although they deliver it to your home…
Honda’s references are as follows:
– Friction Disc: 22201-KY1-0001
– Spring base washer 22125-KT7-750
– Tapered spring 22402-KW7- 900
– Semi crankcase gasket on the clutch side. 11393-KY0- 600.
What tools do we need?
To carry out the operation I am going to put the minimum with which to change these parts so that we can have it almost all in our toolbox, in case you have to buy something apart from the useful one that I will now mention, investing in something of quality is worth it and will save you from spending money twice. The national industry makes tools of the highest quality.
We will need to have a special Honda tool, as it is very common you can order it at the Honda dealership (I don’t know the price but I’m sure it’s expensive) or at your usual spare parts store, do it from a tube or look for it on the internet. It’s him:
– Honda 07716-0020100 lock nut wrench.
And another one that serves to lock the clutch and facilitate disassembly, although it can be replaced with other tricks, is:
– Honda 07923-1070001 Cluch Center Holder.
Tool Needed
We will need basic hand tools that are of quality. Honda has a particularity and that is that it uses only metric torque in the heads of its bolts and nuts, so we will need
– 8, 10 and 12 m.m. socket wrenches
– Impact driver. No impact gun.
– 1 Detachable or tube.
– 1 Large, flat screwdriver
– 1 Phillips screwdriver.
– A strap to lock the clutch, or a tool to fix it that you can make.
– Torque wrench.
– A clutch or piston blocker (piston breaker).
– Fix screws.
– KH7 type degreaser that as it sponsors the trial comes in handy.
– Engine oil.
– Lithium grease.
Disassembly process
I strongly recommend that the bike is very clean, we are going to open a part of the engine and it is important to be neat when working. With the vertical bike we will do the following:
– Remove the deposit.
– Empty the carburetor tank.
– Remove the spark plug.
– Remove the crankcase cover.
– We may or may not empty the oil from the crankcase, if it is necessary to change it but it is not mandatory.
Then we insert the 6th gear and lower the bike so that the rear wheel does not rest on the ground.
– Remove the kickstarter.
– Loosen the brake pedal, you don’t need to remove it.
– Loosen the decompressor screw in the crankcase and remove it from its housing in the cylinder head.
– Loosen the screws of the semi-crankcase.
– Remove the crankcase cover. It may be necessary to use a rubber mallet, but gently and not with prying with screwdrivers.
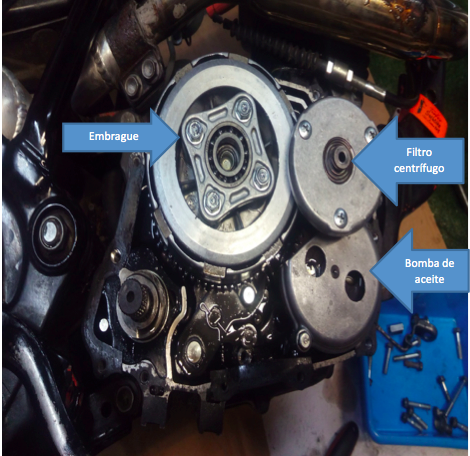
We will find the clutch, the centrifugal oil filter and the oil pump.
The next step is to remove the cover of the centrifugal oil filter, for this it is necessary to block its rotation. As we have inserted the 6 speed we will be able to remove the three Phillips screws by using the Phillips screwdriver or the use of the impact screwdriver.
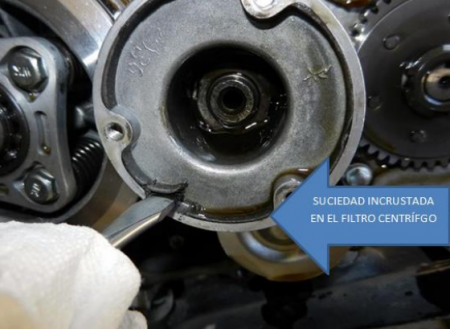
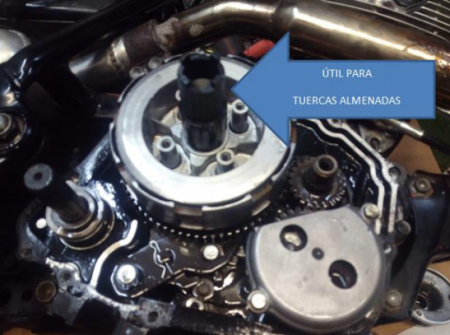
We will find one of the great unknowns, the centrifugal filter. The oil passes through it with the dirt that it drags from the engine and through the rotation of this part and thanks to the centrifugal force, the dirt is lodged and deposited in it. As you can see, a very respectable crust forms over the years and no one usually remembers to remove it. You can see in the center of the filter one of the nuts that we will have to remove with the Honda tool, it is a nut with four battlements. This shaft is the crankshaft so it is quite tight, although as it is greased it does not usually give problems to get it out.
How? Well, by using the tool that blocks the clutch that few of you will have and that you can buy or manufacture. As we have set 6 gear we will insert the detachable between the rim and the swingarm and this will lock the nut so that we can loosen it and tighten it later. It can happen that the clutch slips when trying to disassemble,
What will we do then?, we have to block the rotation of the primary of the clutch that rolls solidly with the crankshaft shaft, for this there is the corresponding tool but if we do not have it, as we have also removed the spark plug we can help ourselves with a piston breaker to block the crankshaft travel. Avoid trying to lock the sprockets with a screwdriver, if any of them breaks, we will have “messed it up”. Tell you that the nut loosens counterclockwise.
Here we can see the Honda tool that locks the crankshaft. Once the nut is removed, we will remove a conical pressure washer that has an indication on the face that should be on the outside. Take out the other half of the centrifugal filter and you will have access to disassemble the clutch. Loosen the four bolts that hold the clutch hub and use the tool again to loosen the other crenellated nut that has, in this case, the clutch bell.
Assembly Process
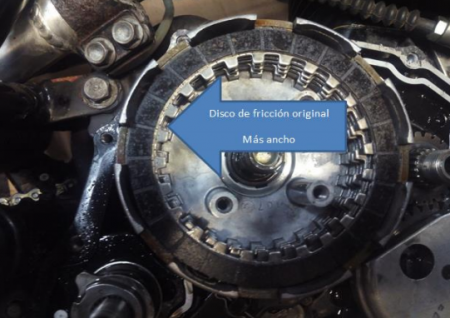
Once we have loosened the nut we will only have to replace the first disc with ferodo that will be the first one you find, but at this point, take the opportunity to check that all the clutch discs are fine, the service limit recommended by Honda is 0.26 m.m. and from the factory they come out with 0.31-0.30 m.m. and the metal discs that are conveniently flat.
Once checked, we will insert the entire pack of clutch discs in the order we have found except for the first one we find when disassembling, which is the one we are going to replace, in its place we will put the one we have bought and that we will have previously left in a container with oil of the same type as the one we use in that engine so that it soaks and does not run dry at any time.
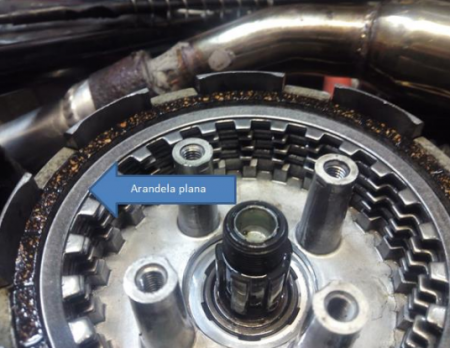
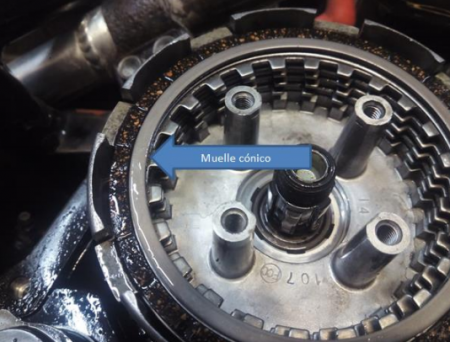
Once the disc is in place, we will then place the flat washer on the base of the spring of the kit and then the pressure spring with the wide part of the cone facing downwards and the narrow part facing outwards.
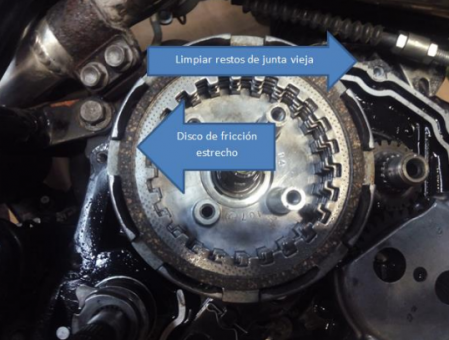
Then we put the clutch hub and tighten it to the recommended torque with the tool and torque and to prevent it from coming loose we apply screw fixers and the assembly process is carried out in the reverse order of the one we have carried out. At this point, it is advisable to change the gasket of the clutch cover and clean any residues that have remained to obtain a good seal. The new gasket that you put on will be greased beforehand, which will favor the tightness and settlement of it. Assemble the rest of the parts using screw fixes.
When assembling the cover of the semi-crankcase, some previous operations must be carried out. To facilitate proper assembly, put consistent grease on the clutch actuator to prevent it from falling during assembly and being loose in the engine.
Then, using the screw that we have removed from the decompressor piece (a 6 m.m. screw), we will insert and tighten it observing that it rotates more or less a quarter of a turn. If we tried to insert the lid without turning that screw at the same time, we would be hit by a piece of the decompressor and it would prevent us from being able to close the lid. We tighten the screws to the recommended torque and check the engine oil level to replace possible leaks during assembly, or if we take the opportunity to change the oil in it, don’t forget to clean the filter sieve that is on the other side (left) and since we have our new bike, enjoy it!
Author: GASyPAR
You can get in touch with the author through the comments of this reportake.