The second-hand trial motorcycle market continues to enjoy great acceptance, both by the amateur who is starting out in the specialty and by those who seek to progress and evolve their trial riding.
The explanation is basically that a new
trial bike
costs more than 6,000 euros, they do not suffer great variations from year to year and their wear is not as pronounced as in other off-road disciplines. Many enthusiasts are not so much concerned about wearing the latest model or state-of-the-art components, but rather a compromise between quality, price and utility that allows them to get started in trial without making large outlays. In addition, these are relatively low-maintenance and affordable bikes, albeit with nuances.

WHAT SHOULD WE TAKE INTO ACCOUNT WHEN BUYING A SECOND-HAND TRIAL BIKE?
First, although it may seem obvious, define a budget. The range of prices where you can find the best value for money and fairly current models is between 1,500 euros and 2,000 euros.
Second, discard conflicting models or edits. At Trialworld we have prepared a guide to each
trial brand
where you can find the particularities and improvements that each model has incorporated since 2002.
WHICH SECOND-HAND TRIAL MODELS SHOULD I AVOID BUYING?
SECOND-HAND BETA TRIAL
The best Rev3s are manufactured from 2005 onwards. You can also find 4-stroke versions of the EVO model from 2009 onwards.
Spare parts and accessories for Beta de Trial
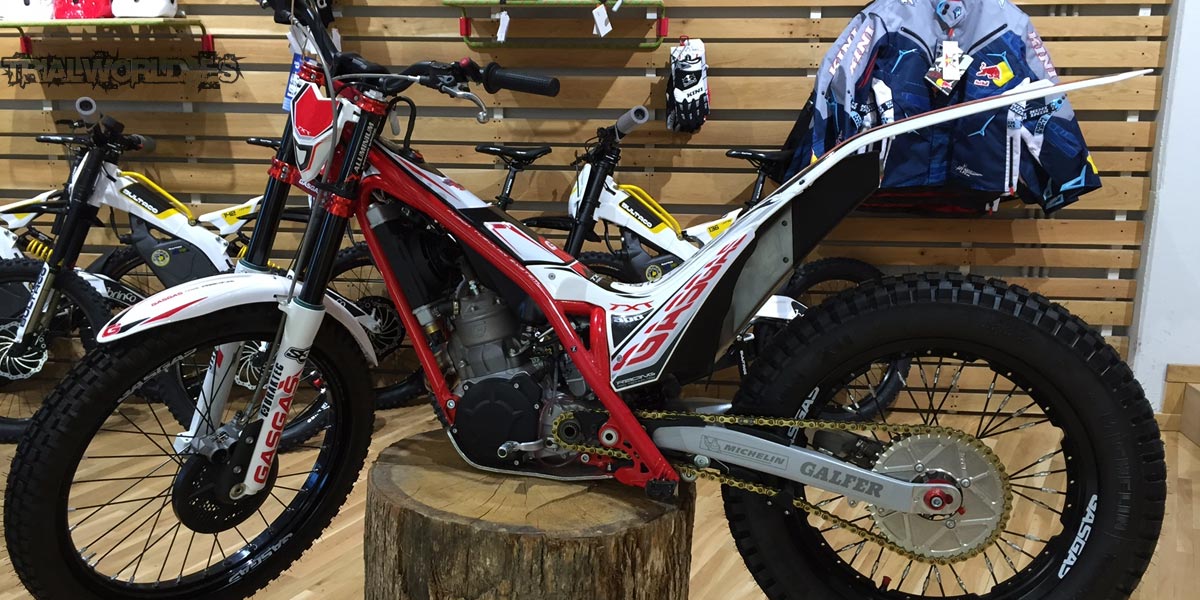
SECOND-HAND GAS GAS TRIAL
Avoid TXT Pro models from model years 2002 and 2003. The best ones are from 2006 onwards. The 2009 and 2011 models are interesting, as both cases receive new frames and the model changes substantially.
Spare Parts and Accessories for Trial Gas
SECOND-HAND MONTESA TRIAL
The Cota 315R is better from 2000 onwards, as it incorporates Showa suspensions on both trains and improves carburetion and exhaust system. The Montesa Cota 4RT has been reliable since the first version in 2005.
Spare parts and accessories for Montesa de Trial
SECOND-HAND OSSA TRIAL
Unfortunately the first models came out too early and the bike was not properly evolved, so the 2011 model is almost a pre-series. The best models are those manufactured from 2013 onwards, although with the factory closed today it is important that you find out about the availability of spare parts.
Spare parts and accessories for Ossa de Trial
SECOND-HAND SCORPA TRIAL
Our recommendation is to opt for the 2011 and later models, which are already equipped with Sherco mechanics. Yamaha engines are complicated to carburete and the mechanical accessibility can be improved. In favor, the geometries of its frame and exclusivity.
Spare parts and accessories for Scorpa de Trial
SECOND-HAND SHERCO TRIAL
They are popular and easy to adapt bikes. Our recommendation is to opt for models from 2005 onwards and, if possible, avoid the 2010 model, which was the first to mount a rear fuel tank.
Spare parts and accessories for Sherco de Trial
Spare Parts & Accessories for TRRS
Spare parts and accessories for Vertigo
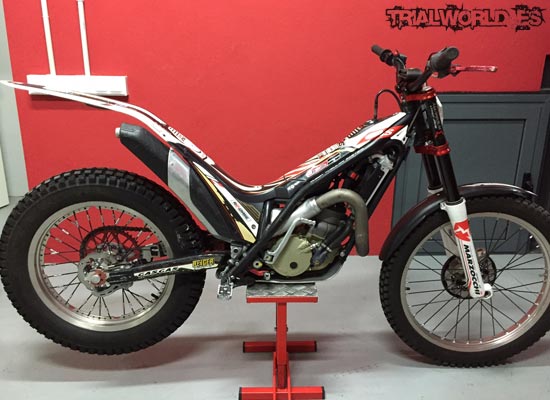
HOW TO ASSESS THE CONDITION OF A SECOND-HAND TRIAL BIKE?
The third factor is the evaluation of the condition and use of the trial bike. Don’t get carried away by aesthetics or first impressions, as it’s relatively inexpensive to give these bikes a facelift.
Our recommendation is that you follow step by step the guide that we have prepared below and help yourself with this
evaluation of a used trial
bike with which you can do a face-to-face exam of the bike without forgetting any important point.
Needless to say, the first step of all is to make sure that everything is correct at a legal and administrative level. Always check the VIN number and its equivalence with the technical sheet, as well as the situation regarding the MOT (if registered) and if at the time of sale the owner provides you with the registration kit of the motorcycle, which will allow you to pass the ITV without problems.
DOWNLOAD CHECK LIST TO REVIEW A SECOND-HAND TRIAL BIKE
WHAT ARE THE ADMINISTRATIVE PROCEDURES LIKE?
We have prepared a complete guide on how to transfer a trial bike to your name or simply the steps you must follow to have documentary evidence that the trial bike is your property.
HOW TO TRANSFER A SECOND-HAND TRIAL BIKE
EVALUATION OF THE GENERAL CONDITION OF THE SECOND-HAND TRIAL BIKE
STATIONARY CHECKS
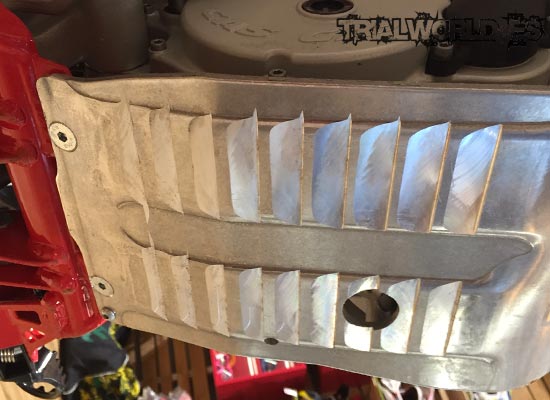
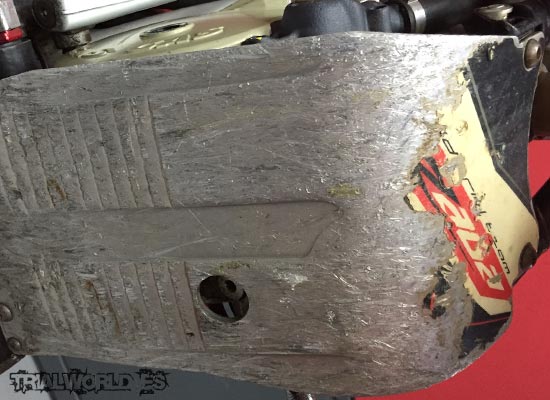
1) Crankcase cover plate
The condition of the sump plate should help us to draw the first conclusions about the type of use that has been given to the motorcycle. We will check the lower part looking for any deformations that may have affected the engine block and we will pay special attention to the state of conservation of the rubber cover crankcase, which absorbs shocks and is located between the plate and the engine.
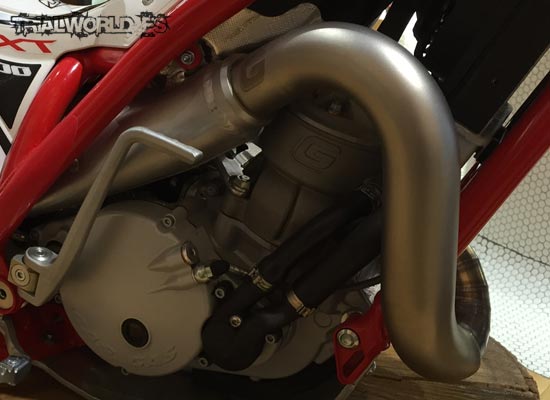
2) Scope of the blows
The objective is to identify and evaluate the possible blows that the motorcycle may have suffered.
We will pay special attention to the following points:
– Exhaust Line: Bumps and possible leaks at the junction points of the different elements that make up the exhaust assembly. A solution after purchase is to mount
exhaust protectors for trial bikes.
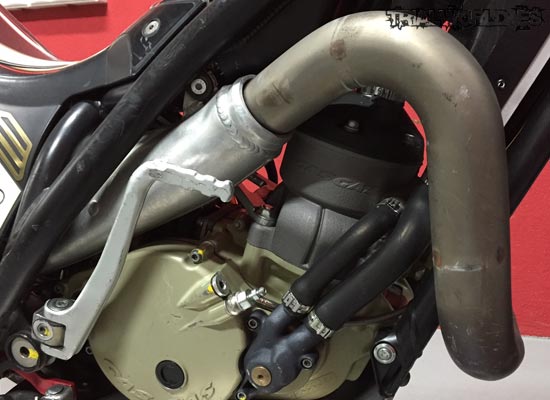
-Chassis: Welding, engine anchors and
trial footpeg
supports.
-Tilt: Condition of eccentrics and their support stops.
– Engine block: Cracks or bumps that may cause oil leaks.
-Radiator: Radiator shocks can cause coolant to leak. To check the tightness of the radiator, we must first check the coolant level and then start the bike so that the water pump begins to move the water through the system.
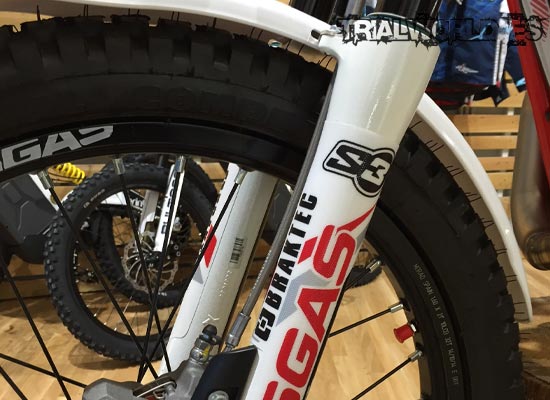
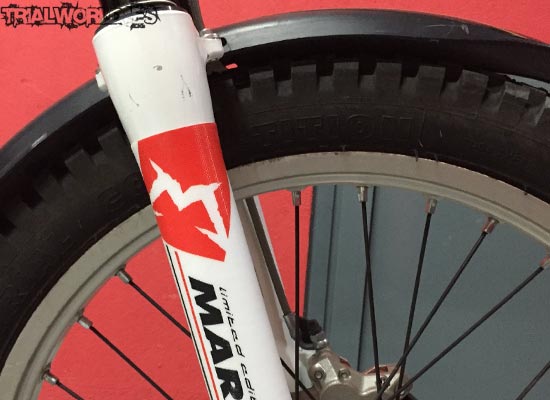
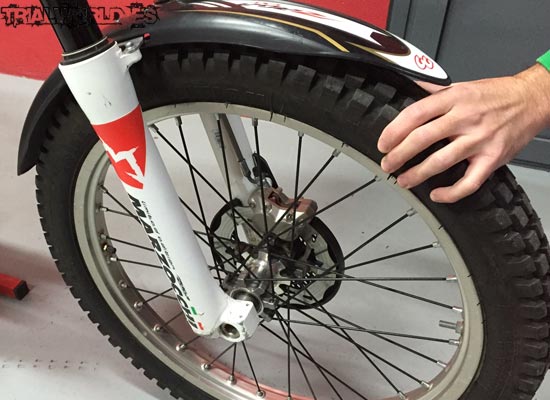
-Forks: Compress the forks to check the condition of the seals. If we notice that any of the bars ooze oil, we must check if they have any bumps or scratches that could have damaged the seals.
3) Front and rear wheel bearings
We will analyze the condition of the bearings of both axles by performing a lateral movement on both tires. If we notice slack in either of the two trains, we will have to replace the
bearings of the trial bike.
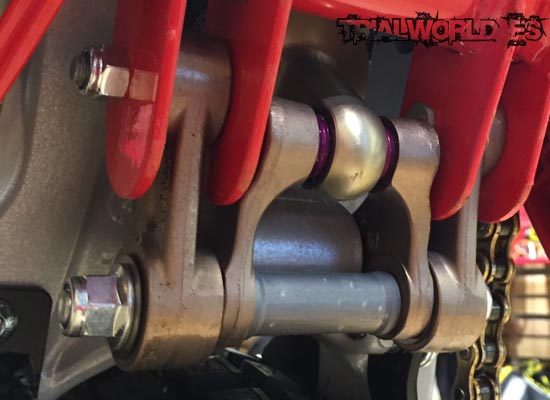
4) Rear shock linkages
Like the sump plate, these are parts that are exposed to continuous shocks. These impacts cause the deformation of the linkage and damage the bearings that allow the free compression-expansion movement of the shock absorber.
We will carry out a visual check and a dynamic check to verify its correct functioning.

5) Tire wear and hardness
The type of wear of the rear tyre knobs can give us a true picture of the type of use that the motorcycle has had:
– Flat heel: The motorcycle has been used for hiking, beginner-level areas or on terrain that does not offer great grip.
– Diagonal cue: The motorcycle has been used in technical areas with great grip and that in turn require a medium-high level of riding.
6) Tire Bumps
Tire deformations are often caused by tires with low pressure that are not able to absorb imperfections in the ground. These blows cause the rim to lose center and even lose air if the tires do not require the use of an inner tube for inflation. (Tubeless tires).
7) Drag Kit
The drag kit is not usually an element of great wear and tear on this type of motorcycle because its use is not associated with the long-distance route in terms of kilometers. If the use of the motorcycle has been purely “trial” and the chain tension has been correct, the drag kit should not have great symptoms of wear.
8) Chassis Number
You can find it die-cut on the steering tube on the chassis itself or on a sheet metal. We will check that there are no signs of tampering in the die-cutting and that the number matches the one found on the vehicle’s registration certificate.
On this same document, we will verify that the ownership of the vehicle corresponds to that of the seller’s DNI. If the vehicle is not registered, we will verify the chassis number with the vehicle’s technical data sheet and verify ownership by requesting the seller for the sales contract or purchase invoice in your name.

ON-THE-MOVE CHECKS
1) Fan & Radiator
It is advisable to check the correct operation of the fan (only on water-cooled motorcycles). If the bike is completely cold, we will wait 3 to 5 minutes for it to start working. The waiting time varies depending on the outside temperature, decreasing with high temperatures and increasing with low temperatures.
2) Gearbox
To check the gearbox, we recommend starting the motorcycle and engaging each and every gear. They should enter smoothly and not come out once engaged.
3) Carburetion
– Fat mixture: The bike spews excessive smoke from the exhaust and at medium revs begins to fire preventing a correct power delivery from occurring. In these cases, hot starting is often a complicated task.
– Poor mix: When you release the accelerator the bike takes time to get down the revs, it seems to continue revving.
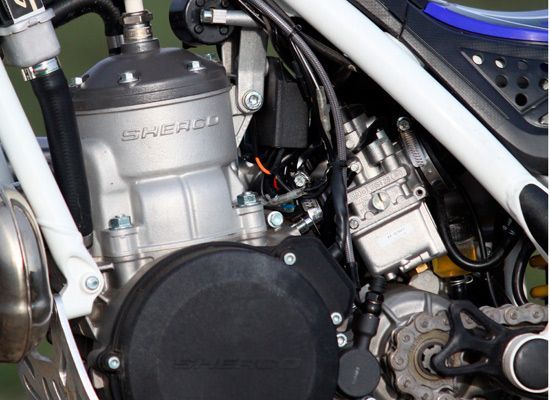
4) Engine noise
Engine noises are the trickiest to identify because they vary from model to model. Generally, we can identify two types of noise:
a) Wear of the cylinder and piston: If they are in poor condition we will notice that the engine becomes very noisy in its thermal zone. This area consists of a cylinder head, piston and cylinder.
Manufacturers recommend replacing the piston every 50 to 60 hours of use. If we exceed this specification, the piston begins to wear down the inside of the cylinder and ends up causing excessive clearance between the two components. This clearance is what produces the noise that we can detect and that will become even more noticeable when it affects the connecting rod and the crankshaft over time.
To extend the life of the piston, we recommend cleaning the air filter before each outing and avoiding cold acceleration. Here’s a
tutorial on how to change the cylinder and piston on a trial bike.
b) Crankshaft bearings: We will notice a “rattling” in the lower part of the engine block. It is a low sound, which as we have mentioned before can be caused by a piston in poor condition, by the entry of water into the engine block, lack of lubrication or low oil quality.
5) Clutch
To evaluate the degree of deterioration in which the clutch of our future motorcycle can be found, we must review the following points:
a) Oil visor: It is advisable to check the color of the oil in the crankcase. It is common to find completely white oils. In these cases, the water pump seal is most likely in poor condition and ends up leaking water from the coolant directly into the crankcase. In the long run, the clutch deteriorates, causing the clutch discs to swell.
b) Engage a gear with the clutch engaged: Start the bike in neutral and engage the clutch completely and then engage a gear without touching the accelerator. If the bike starts to roll or stalls, we can say that the clutch is showing the first symptoms of fatigue.
Once the first symptoms of fatigue have been identified, we will go on to perform the same test but this time when we engage the gear we will give a blow of the accelerator. If when accelerating the bike stops and when we release the throttle it starts running again, we can say that the clutch is showing clear signs of wear. If the clutch does not respond to the throttle shocks and the bike trips, we can say that the clutch is totally worn.
c) Another way in which we can identify the state of the clutch is by testing the motorcycle on a road and upshifting a high gear (3rd or 4th). If when accelerating at full throttle with the engine disengaged we notice that the motorcycle revs excessively without transmitting power to the rear wheel, we can suspect that the life of the clutch is close to running out.